
What’s essential to know about transcoding for Media Composer

Creating media to use in Media Composer is not straightforward, people new to Avid Media Composer quickly learn. But, as seasoned Avid editors know, it’s not hard to let Media Composer become your best friend.
We’ve collected all that we’ve found to be essential for a good Media Composer workflow, to try to help you save you a few grey hairs. If you’re starting out with Media Composer, consider this essential information.
In 15 minutes, we’ll help you understand what you need to know about MXFs, DNx, RAW, plus a bit about AAF and MDBs. That’s a lot of acronyms you’ll be able to throw around at parties when people ask you what it is that you exactly do for a living 😉
MXF
MXFs are everywhere in media production, but none are alike. A MXF can contain about anything - they’re just a container for some media, or “essence”. That essence can be RAW, a mezzanine codec like ProRes, or, in the Media Composer context, a DNx clip.
Chances are you’ve run into this beauty when importing a random MXF into Media Composer:
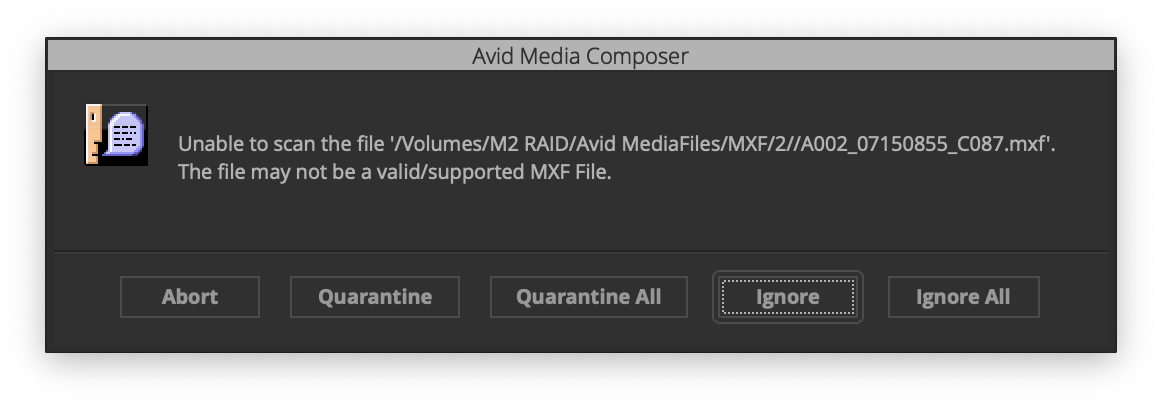
You can’t recognize a so-called “native” MXF, one that will work in Media Composer without required re-transcoding, by its cover, so this alert is pretty common. Opening MC to check each clip for compatibility is obviously a bit of a bother; it’s much easier to know upfront which app was used to make your MFXs and then draw your conclusions.
Evidently, Media Composer itself is able to create native MXFs but using it will lock up your Avid suite as you can’t use it to edit at the same time. That’s why there’s a range of third-party transcoding apps available. Important: the most widely used ones (Adobe Media Encoder, FFMpeg and Apple Compressor) can’t generate native MXFs. There’s no use in trying — half of the internet has been there and failed.
RAW
As said, MXFs can contain a lot - including RAW media. Why not use that, I hear you ask? Because you like to stay sane.
Sure, you can use RAW media in Media Composer without first transcoding. It’s called Linked Media, and is more widely known by its old name AMA. Remember that when you some inevitable day stumble onto an ancient CreativeCow thread, trying to figure out some obscure Media Composer alert…
AMA Linked Media relies on vendors releasing third-party plugins for Media Composer. As with every NLE wide
codec support is a bit idiosyncratic. If there is a plugin available for your preferred RAW flavor, having one available
for Apple silicon is not a given. Besides that, editing with RAW (or even just a compressed format like H.264) puts a
heavy toll on your machine. Playing back a DNx file is not CPU-heavy at all, compared to that. Did we already mention
the color management trouble that’s down the AMA road?
DNx
To be able to work comfortably in MC, without pulling out your hair due to playback issues, you’ll want to edit exclusively with DNx media. DNx is Avid’s proprietary codec. It used to be available in one flavor: DNxHD. When higher resolutions and frame rates came to the scene, Avid re-engineered DNx and released DNxHR.
DNxHR is not just a DNxHD for high resolutions; it’s a completely new format with a very different approach to frame rates and or resolution. It allows you to mix frame rates and resolutions on a single timeline, whereas DNxHD is won’t go beyond 1080p.
OP-Atom & OP1a
Back to MXFs. There are two types of MXFs: OP-Atom and OP1a. It’s not a huge difference, but it’s good to know by heart so you can spot which type is in use at just a glance.
With OP-Atom, you get separate MXFs for the individual video and audio streams. Media Composer then combines these into one Clip inside a Bin using an AAF that’s also generated when transcoding.
OP1a MXFs contain all the video and audio streams captured by a camera or recording device in one container, which Media Composer will see as one Clip inside a Bin. So, if you spot a video MXF next to audio MXFs, you’re dealing with OP-Atom.
For a long time, OP-Atom was the only option as Avid didn’t support OP1a natively until the release of the Universal Media Engine in Media Composer 2019.6. The default flavor Avid generates is still OP-Atom. OP1a has a place and time, and it’s not during the edit. It’s typically used for generating deliverables.
Transcoding
Avid Media Composer is an NLE, not an assistent editor’s tool. So, it’s not great at doing simultaneous jobs. MC was never meant to be used solely as a transcoder, and that shows when you use it as such. You either block the whole app, using the Transcoder dialog, or you run it as a background process which crumbles Media Composer’s performance, at least for as long as it doesn’t crash.
So, don’t use Media Composer for that. The upside of not having to use MC as a transcoder is of course making one more edit suite available for editorial.
Historically, third-party transcoding for Avid has been available only in software like Colorfront, Assimilate, Telestream, and Resolve Studio. A lot of people were also trying to get FFmpeg to generate native MXFs, but that won’t work. Now, it’s available in EditReady too.
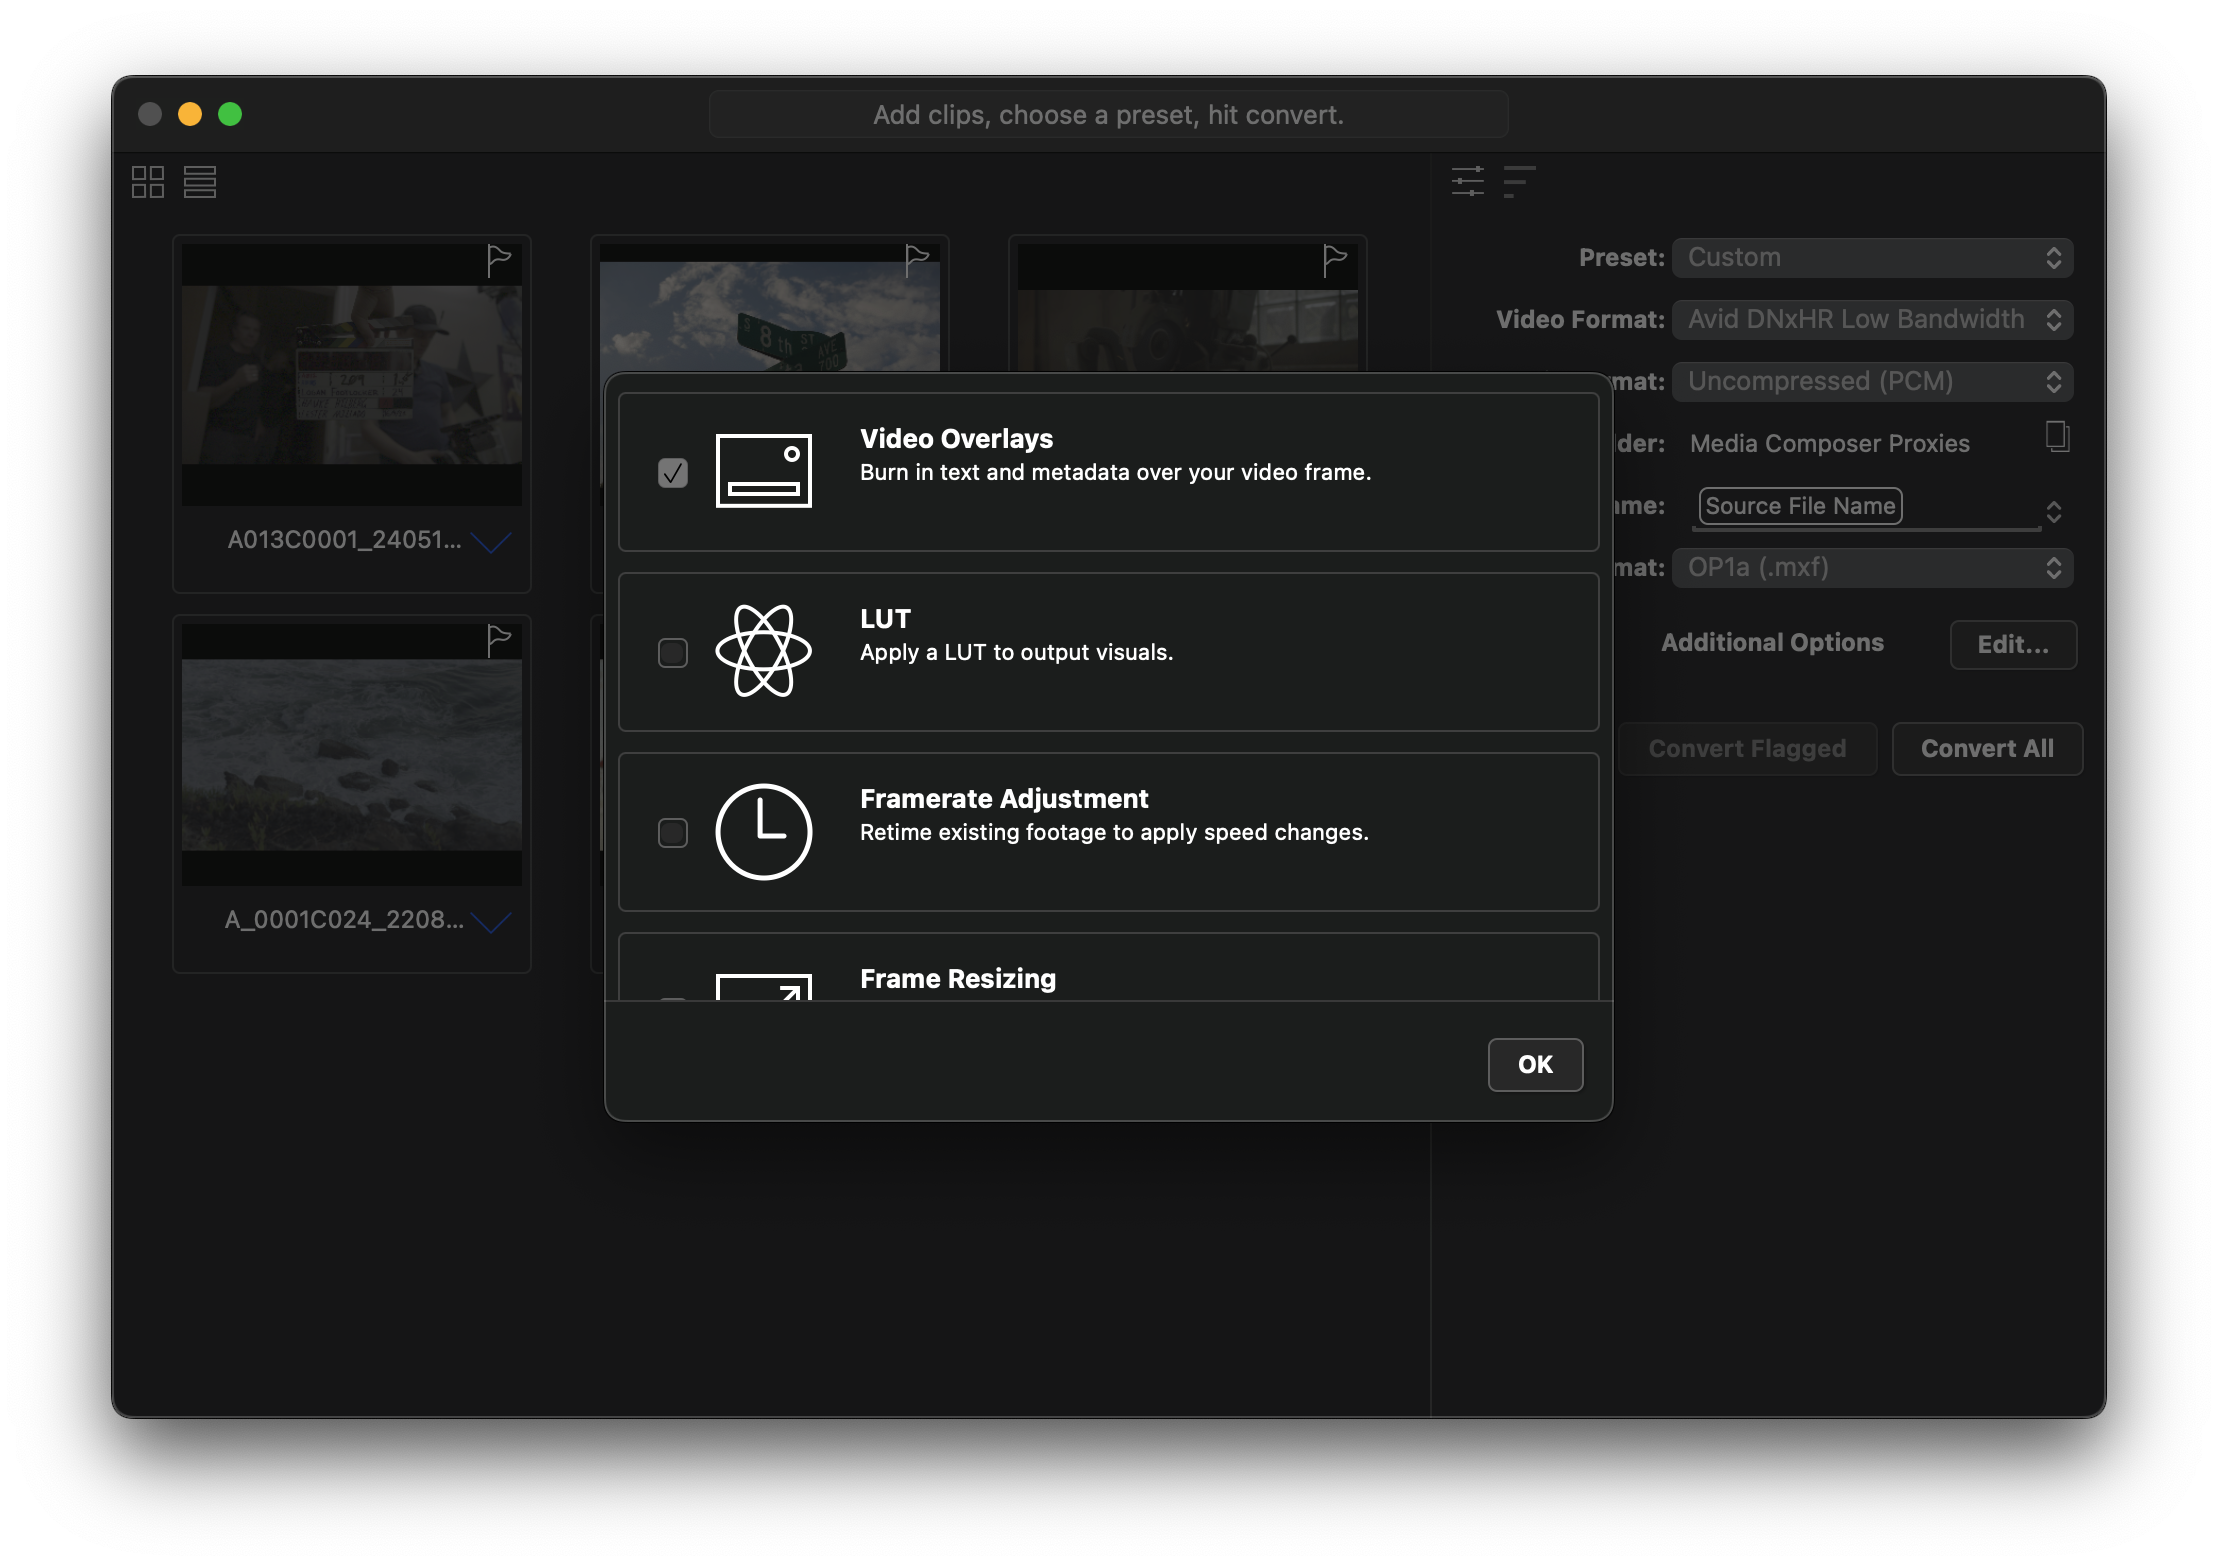
Transcoding isn’t just about converting one codec to the other. Burn-ins are massively hard to do in MC. Don’t put burn-ins on your timeline; it’s a breeze to do in EditReady: build your own using metadata, or include burn-ins handed to you by the studio. The same goes for applying LUTs and renaming clips. All three are typically done by an assistent editors, or at least done before the editing starts. Make your life easy, and do all of it before you start populating bins.
Creating proxies outside of Media Composer
Let’s put all that theoretical info into practice. Here’s how to transcode your media for Media Composer in a way that’s guaranteed to work:
Add the clips you wish to transcode to EditReady
In the Preset dropdown, choose the
DNxHR LB (MXF)preset.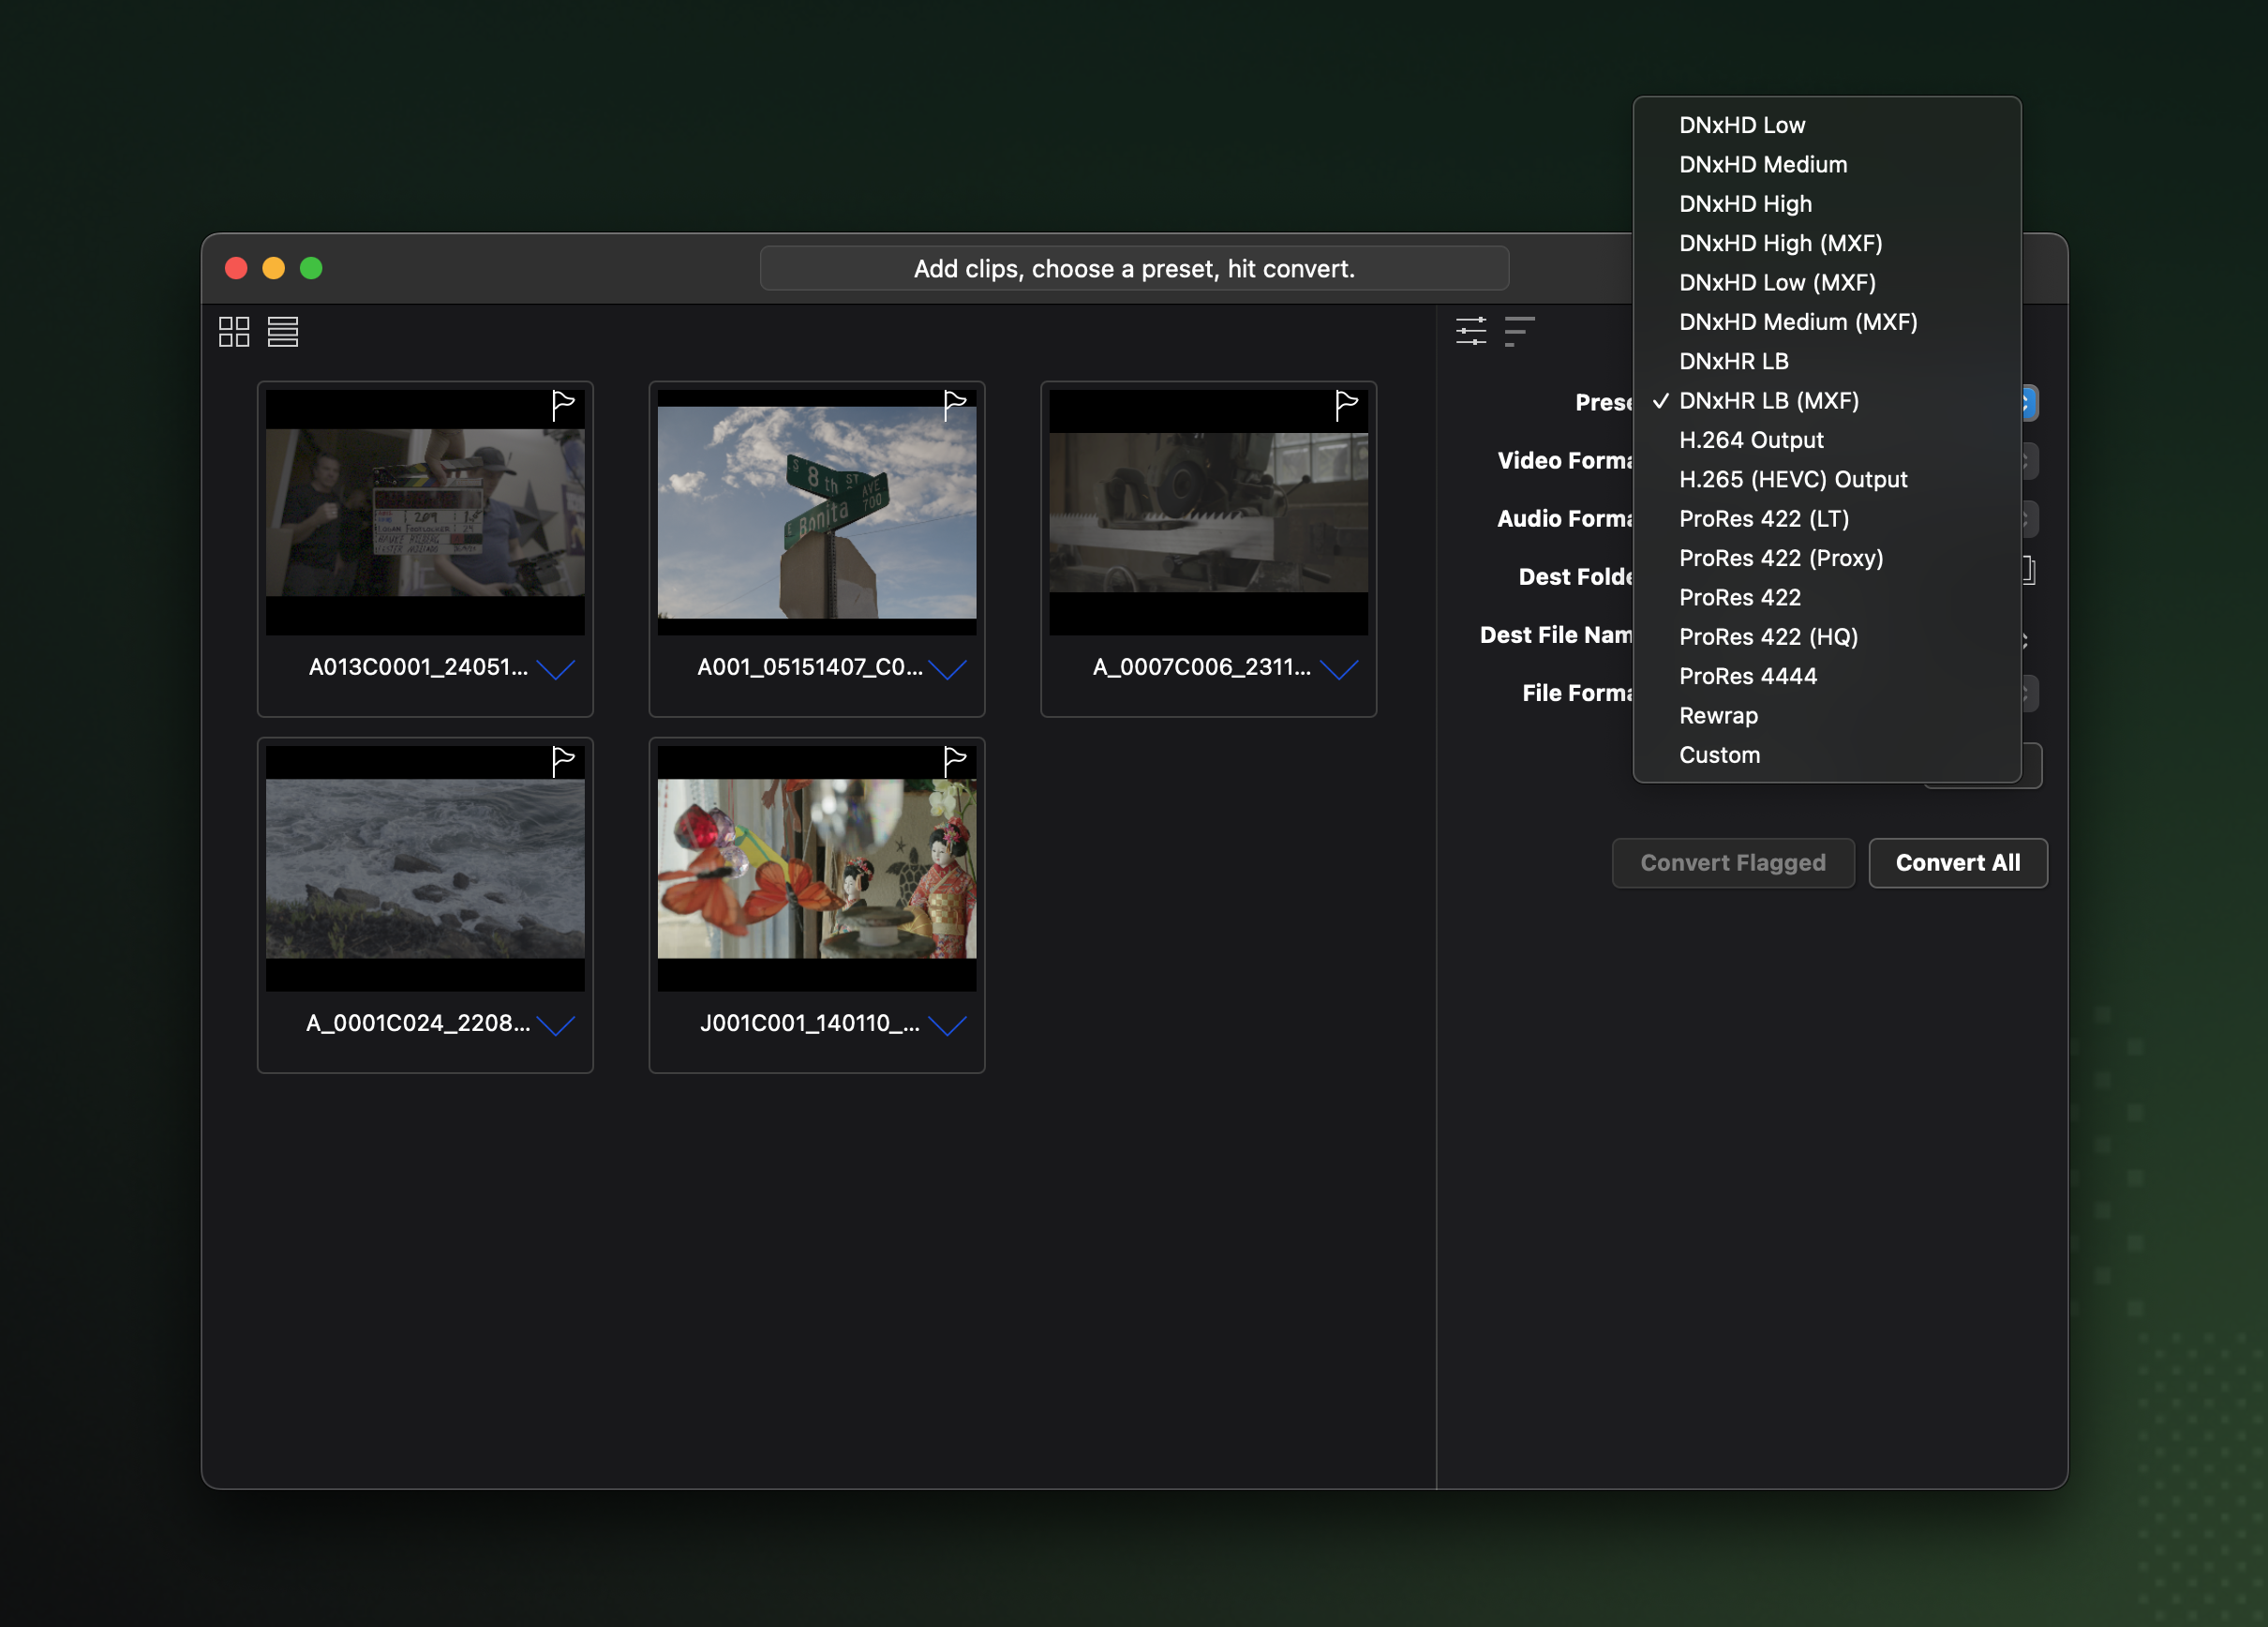
Next, select
Customfrom the Preset dropdown. Selecting a Custom preset enables the File Format: dropdown.As the File Format, choose
OP-Atom (.mxf).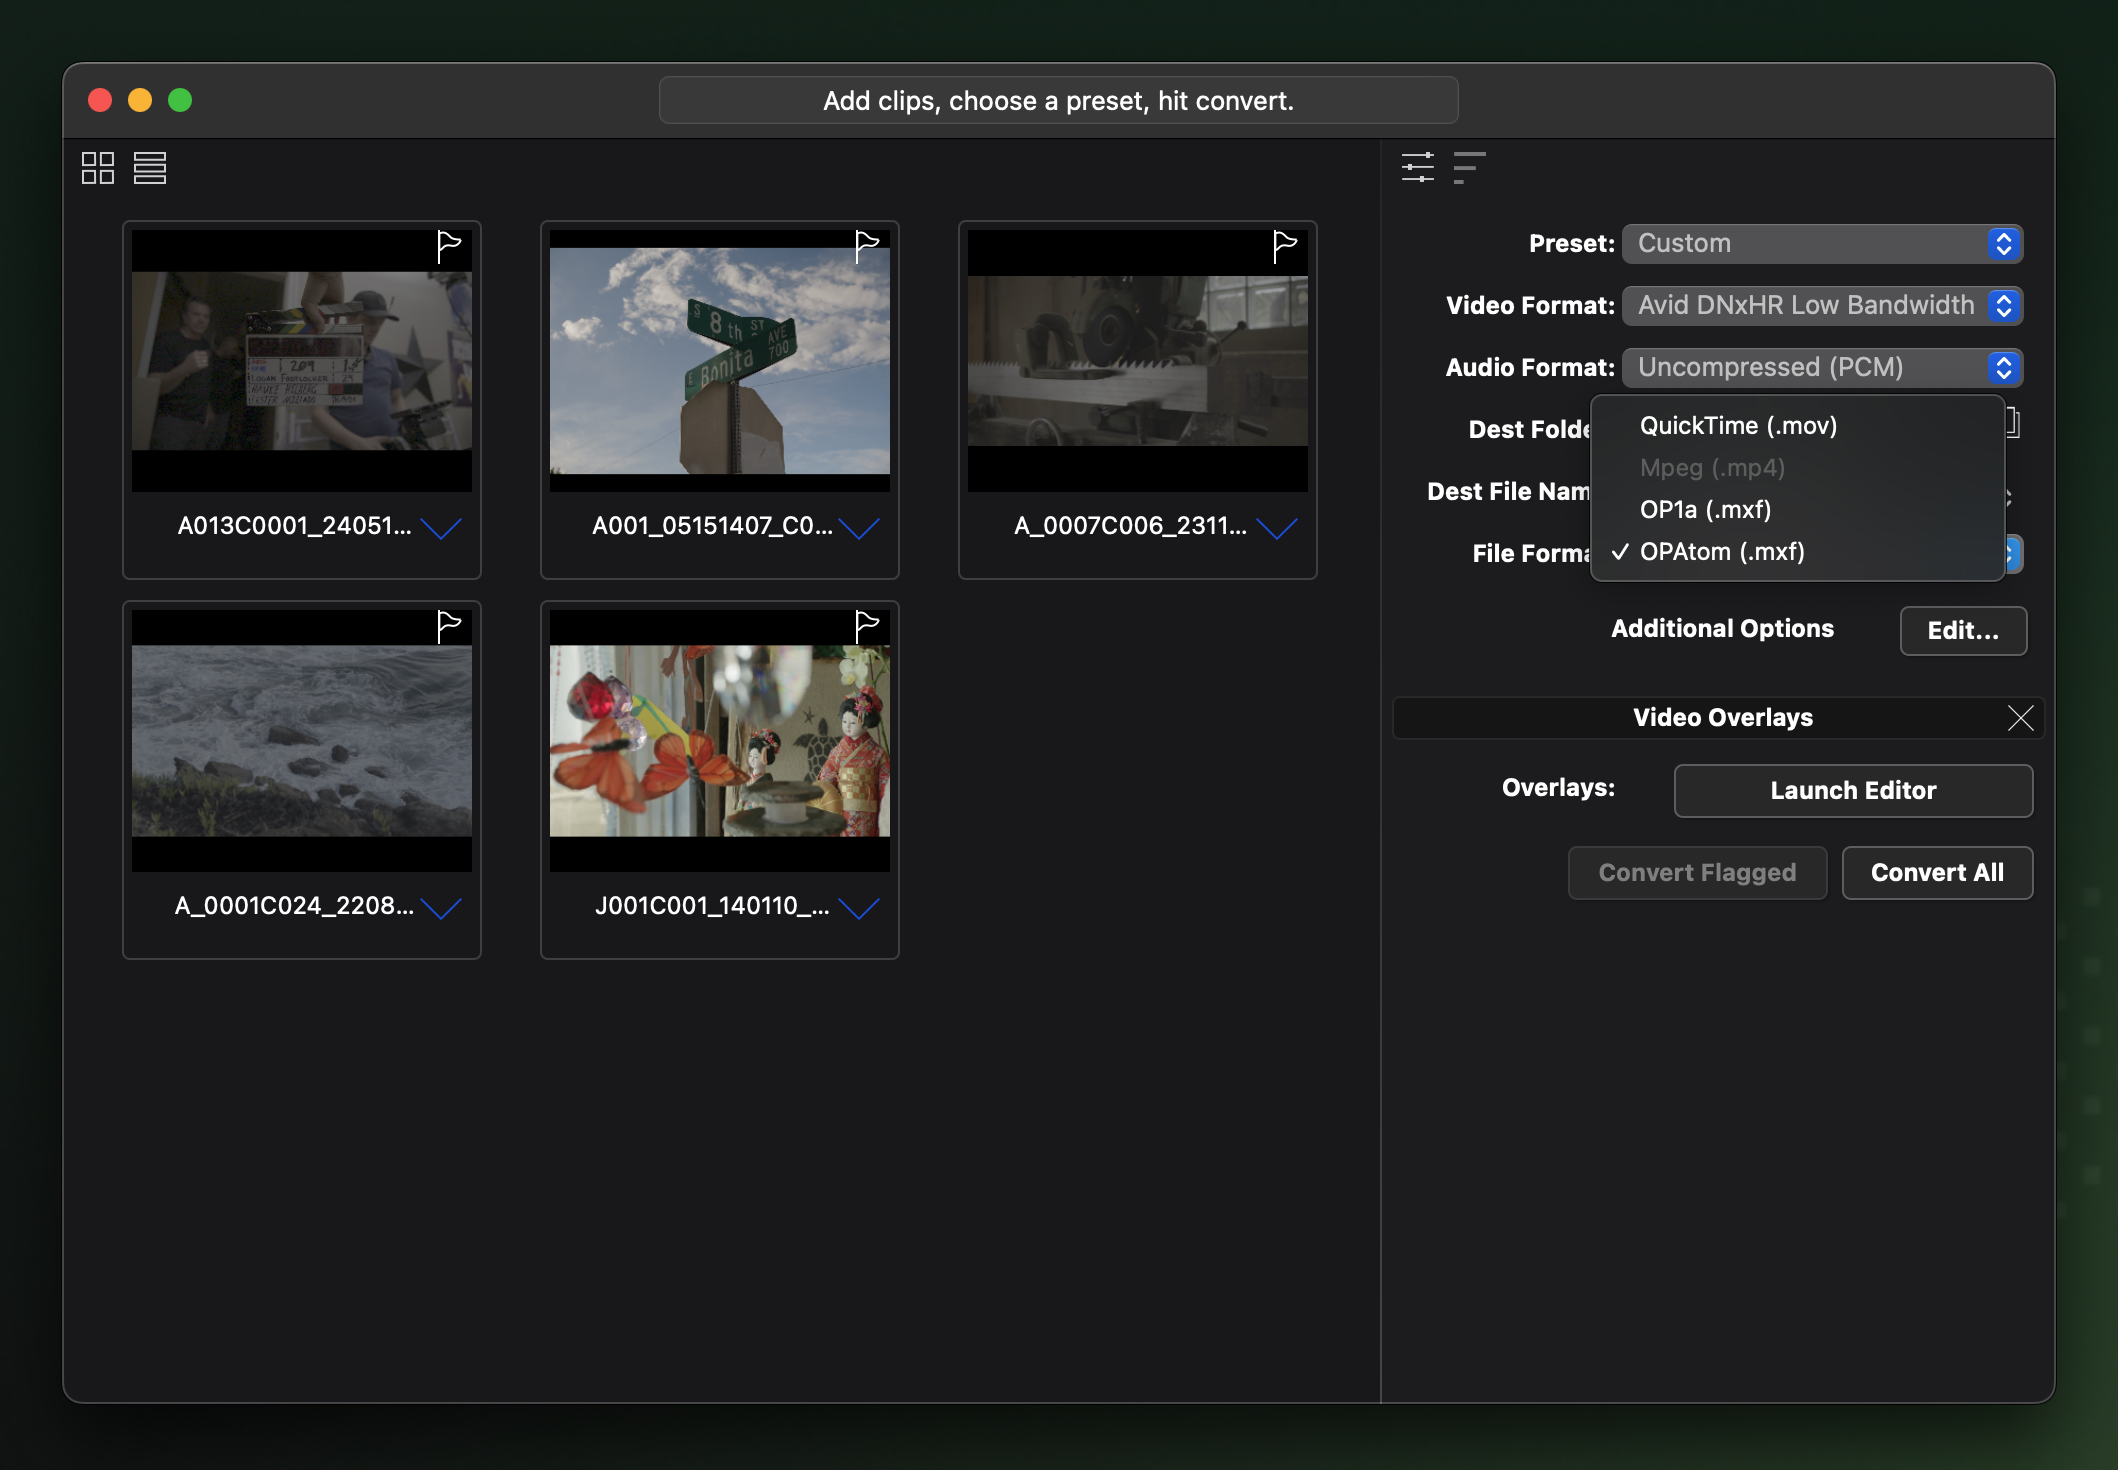
If needed, customize your transcode settings:
If you plan on using this recipe more often, go to Batch > Save Current Preset and give your preset a good name.
Click
Convert All.
Your transcoded MXFs will now become available in the Dest Folder location, alongside the corresponding *.aaf files for each clip.
Drag the exported .mxf files inside your
Drive root > Avid MediaFiles > MXF > 1(2, 3 etc) folder
Back in Media Composer, open a bin and drag the generated
*.aaffiles into the bin.
MDB or AAF?
Everyone that has ever worked with Media Composer likely knows the “trick” of deleting the MDB file to have MC regenerate it, and then drag the MDB into a bin to import all clips. That’s not super useful if your folder already contained dozens or hundreds of clips. AAF to the rescue.
If you save all media in a single folder, the MDB will contain a reference to all clips. If you often transcode small batches of clips, it’s easier to use AAFs to add clips to bins.
💡 Lesson 6 - Use MDB for importing all media in a folder, use AAFs for importing selections of media.
Closing Titles
We’d love you to use EditReady for creating your Media Composer proxies but it’s definitely not the only option available. It is rather affordable though, and supports a lot more codecs than other apps do. It’s also around twice as fast as Media Composer’s transcoder. Use that knowledge to your benefit, I’d say 😉
Also, be sure to check out our Media Composer guide for more insights on how to create media that's fit for use in Media Composer:
💡 For an even more comprehensive Avid workflow, check this additional blog about conserving metadata with ALE (Avid Log Exchange).